Many Tibbo customers first came to know us by our fixed-function Serial-over-IP (SoI) devices, a.k.a. Serial-to-IP converters, a.k.a. serial device servers.
Examples of such converters are the DS203 device server and the EM203 module.
These products are supplied with traditional "fixed" firmware.
This project is a Serial-over-IP (SoI) application written in Tibbo BASIC. It runs on our BASIC/C-programmable devices,
such as the DS/WS110x family of programmable serial controllers.
The features offered by the SoI application closely resemble, and in many cases, exceed those of our fixed SoI firmware.
The following table details the feature availability for various Tibbo devices (not all supported devices are shown):
Connecting the DS1101 to your Ethernet network
The DS1101 has an Ethernet interface. It is connected as soon as you plug a live Ethernet cable into the DS1101.
Once the DS1101 is connected to an Ethernet switch (router), its yellow Link LED turns on.
Uploading the SoI app
All DS/WS110x family devices ship with the SoI application preloaded and properly initialized.
If you need to reload and reinitialize the application — for example, in case your device was used to run something else — follow the steps below.
Subsequent firmware upgrades can also be performed via DS Manager (part of the TDST).
Initializing SoI Settings
When you first run the application, the device might enter the error mode, which means that its settings (programmable parameters stored in the EEPROM) require initialization.
The error mode is indicated by a blinking red status LED. Devices with a display will also have the following message on the screen: "ERROR MODE! Press & hold to reinitialize the device."
To fix this, initialize the SoI settings:

DS Manager
- If your device has a display
- Briefly press the MD button to turn the display on
- When at the "ERROR MODE" screen, press and hold the MD button until you see the "INIT COMPLETE" message
- Reboot (power-cycle) the device to complete the initialization
- If your device has no display
- Press the MD button once to enter the serial programming mode (red and green status LEDs blinking)
- Press and hold the MD button
- Wait until the green status LED turns on (initialization finished)
- Reboot (power-cycle) the device to complete the initialization
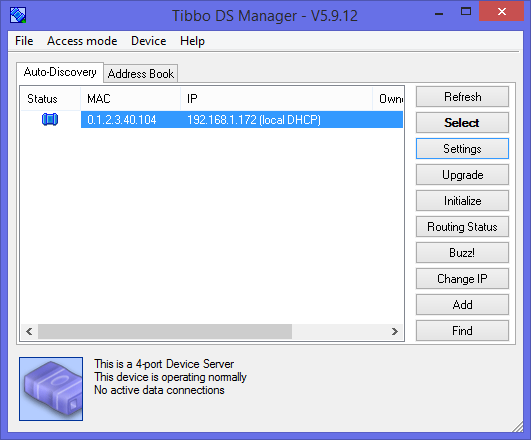
After the reboot, you should be able to see your device in DS Manager. Initialized devices have their DHCP turned off, so your DS1101's IP will be 1.0.0.1.
Note: From time to time, our users encounter firewall issues. You may have to disable your firewall (or allow UDP traffic on port 65535) for DS Manager
to be able to see your device.
Connecting the WS1102 to your Wi-Fi network
The WS1102 is a wireless device, so it has to be configured for connecting to your Wi-Fi network (access point).
The Wi-Fi settings are stored in a Device Configuration Block (DCB) located in the flash memory.
You must have the device connected to your Wi-Fi network before proceeding with anything else.
The procedure below explains the configuration process through the BLE interface.
The assumption is that you have the SoI Companion App present on the WS1102 as APP0 (every WS1102 ships with this app preloaded).
The steps:
- Install the L.U.I.S. app (iOS, Android) on your smartphone.

- Power off your WS1102. Press and hold the MD button, then power the device back on.
- Wait at least 3 seconds for the red status LED to turn off. When the green status LED turns on, release the MD button.
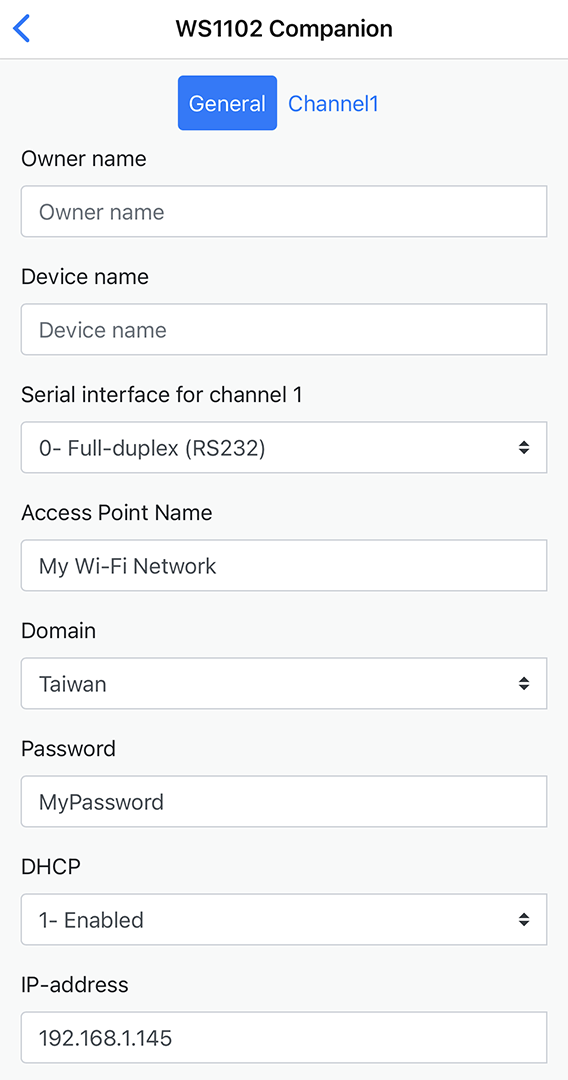
- Open the L.U.I.S. app and select your WS1102. You will be presented with a configuration screen (shown on the right).
- In the configuration screen, set the following parameters:
- Access Point Name should be set to the SSID of your Wi-Fi network (access point). This field is case-sensitive.
- Password should match the password of your Wi-Fi network (access point). This field is case-sensitive.
- DHCP would normally be enabled. Alternatively, set the desired...
- ...IP-address (and if your device will be accessing outside of your LAN, you will also need to configure the Gateway IP-address and Subnet mask).
Once the WS1102 associates with your Wi-Fi network, its yellow Link LED turns on.
Uploading the SoI app
All DS/WS110x family devices ship with the SoI application preloaded and properly initialized.
If you need to reload and reinitialize the application — for example, in case your device was used to run something else — follow the steps below.
The explanation below shows how to upload the SoI app via the Wi-Fi interface.
It is also possible to upload the SoI app into the WS1102 via the BLE interface using .TCU files.
For step-by-step instructions on BLE uploads, see our documentation.
The steps:
DS Manager
Subsequent firmware upgrades can also be performed via DS Manager (part of the TDST).
Initializing SoI Settings
When you first run the application, the device might enter the error mode, which means that its settings (programmable parameters stored in the EEPROM) require initialization.
The error mode is indicated by a blinking red status LED. To fix this, initialize the SoI settings:
- Press the MD button once to enter the serial programming mode (red and green status LEDs blinking)
- Press and hold the MD button
- Wait until the green status LED turns on (initialization finished)
- Reboot (power-cycle) the device to complete the initialization
After the reboot, you should be able to see your device in DS Manager. If your WS1102 is running with DHCP turned off, it will use the fixed IP address you set earlier.
Note: From time to time, our users encounter firewall issues. You may have to disable your firewall (or allow UDP traffic on port 65535) for DS Manager
to be able to see your device.
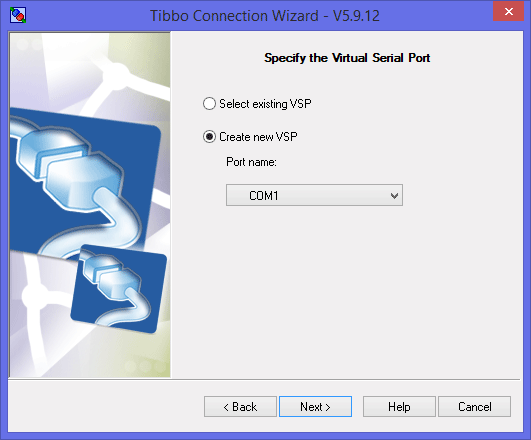
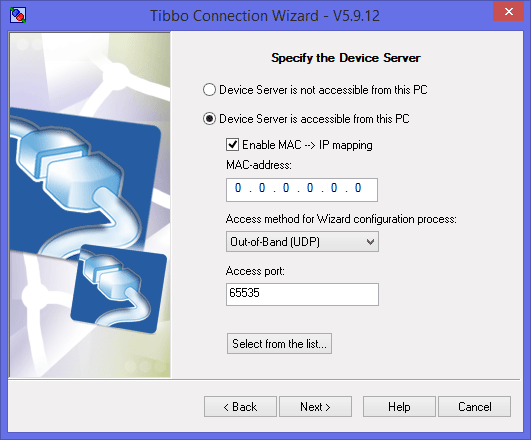
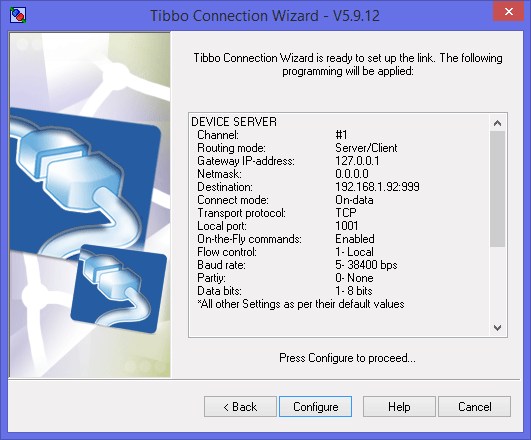
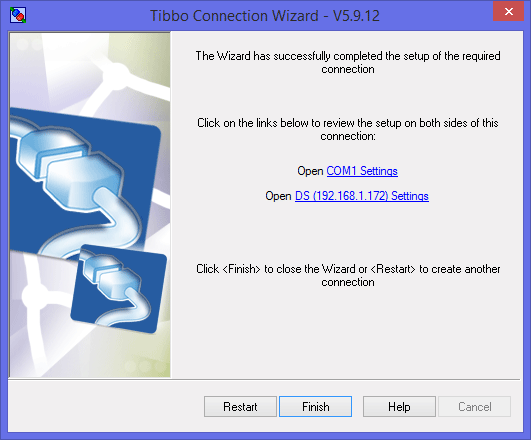
Configuring the VSP-device link
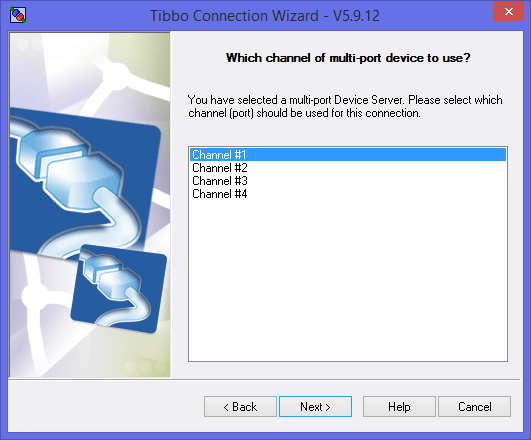
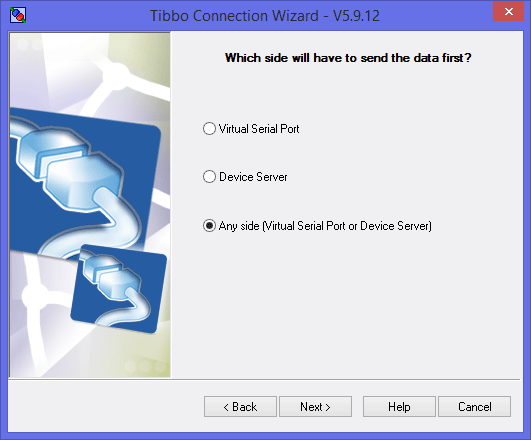
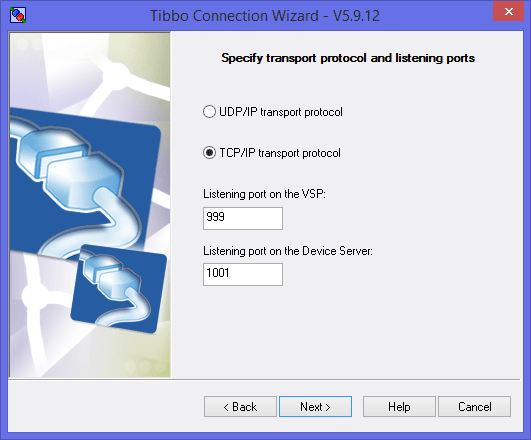
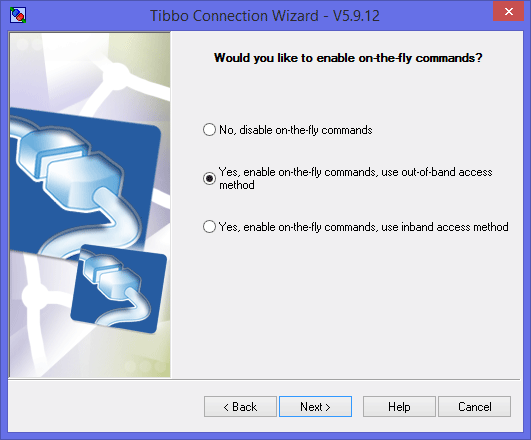
To configure a Virtual Serial Port (VSP) for use with your device, launch the Connection Wizard (it is a part of the TDST) and follow these steps:
IO Ninja
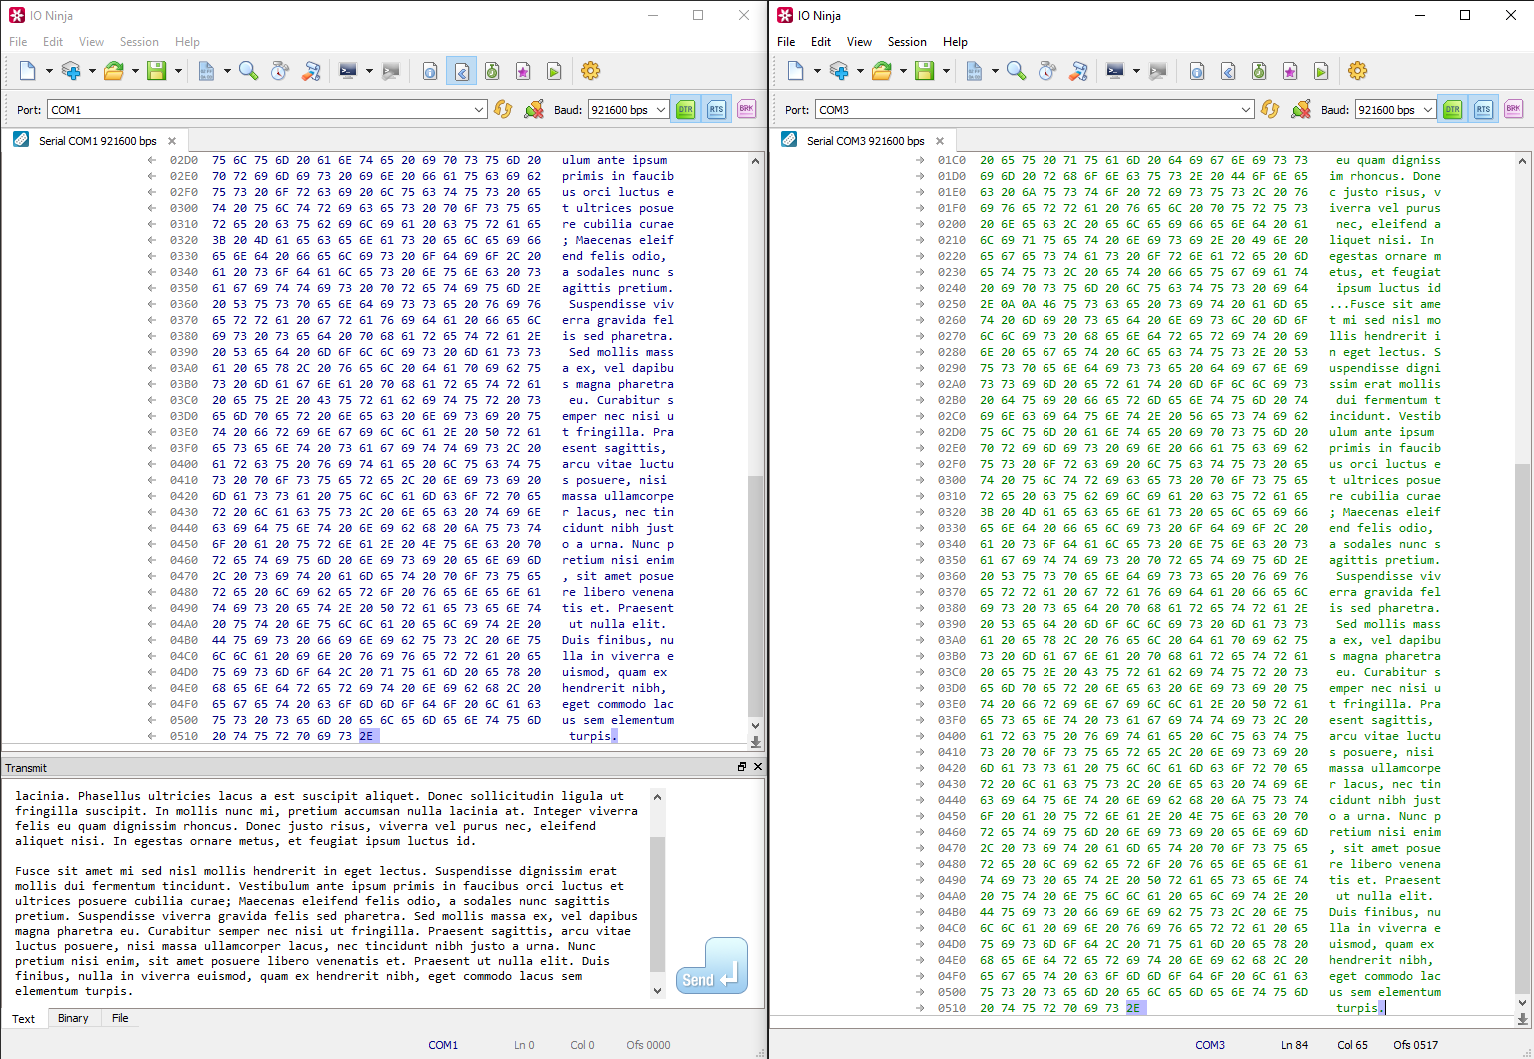
Testing the VSP-device link
Any "serial terminal" software will do — we suggest our very own IO Ninja.
- Download and install IO Ninja
- Select File > New Session
- Choose Serial and click OK
- Select your VSP and click Open Port (the lightning bolt icon).
- IO Ninja is now ready to send data to the device

Note: Our TDST software includes the Tibbo Monitor; it is found in the system tray. Tibbo Monitor maintains a log of all VSP activity.
Observe what happens when you open and close your VSP port in IO Ninja, change the baudrate, etc.